The most awaited time of the year is just around the corner.
Ramadan has such an amazing vibe to it. Ever since I became a homemaker and solely responsible for Ramadan preps, I always get a little apprehensive and nervous about fulfilling my duties, spiritual and wifey. It took me a little while to realize that every act done with the right intention is Ibadah itself, from spending time on social media, cooking and feeding people around you, or spending day and night reading Quran and in Sujood. Allahu a’lam.
Alhamdulillah Ramadan is fast approaching and I have been wanting to teach my older son to understand the purpose of Ramadan, that it’s beyond the samosas and puddings. I hope he gets excited enough this year to feel the hangover after Eid like I, and possibly you too do, every year.
I decided to create an advent calendar for him to get him interested and intrigued. The point of an advent calendar is to count down to a special occasion or festival, with a little surprise, whether little sweet treats, gifts, challenges like puzzles, basically anything that a child would look forward to.
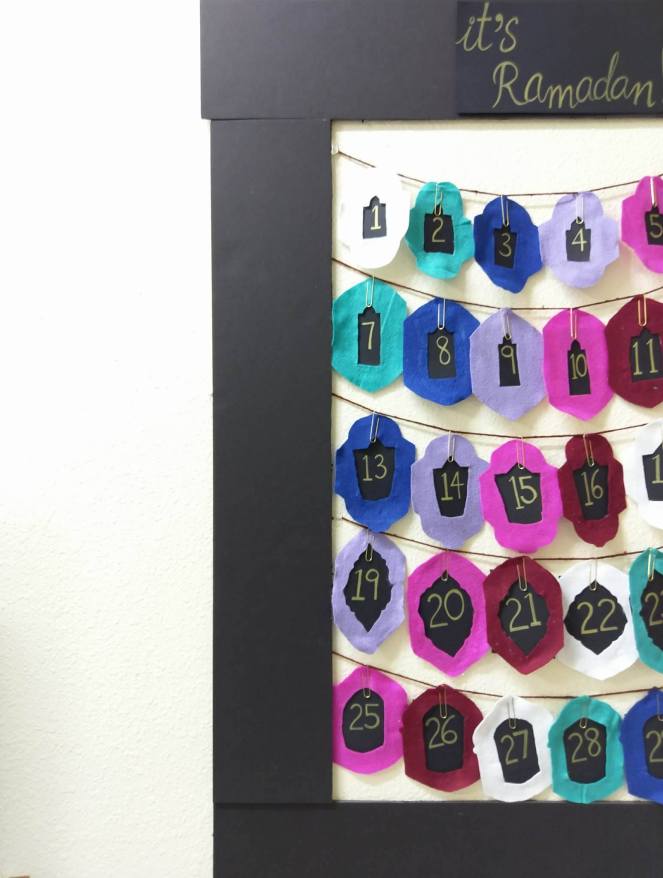

The following DIY was created with felt fabric, but these can be done with paper of a decent GSM too. Each lantern corresponds to each day of Ramadan as written on it. The point is, each day around or after iftar, you take the surprise chit stuck to the back of the lantern, on the black chart paper. How cute is that!
Materials needed
Felt fabric OR good quality/ thick in patterned/ colored paper-thin should be able to make about 30 rectangular pieces of A5 size (150 x 210 mm)
Foamboard to make a frame
Wool
Paper clips/ wooden pegs
Scissors
Glue
Black chart paper cut into 140 x 200 mm rectangles
Gel pens or shiny markers
Instructions
- Download the template for the lanterns
You may also created your own shapes, of course.
Decide the pattern of colors and shapes you want to arrange the material you have in.
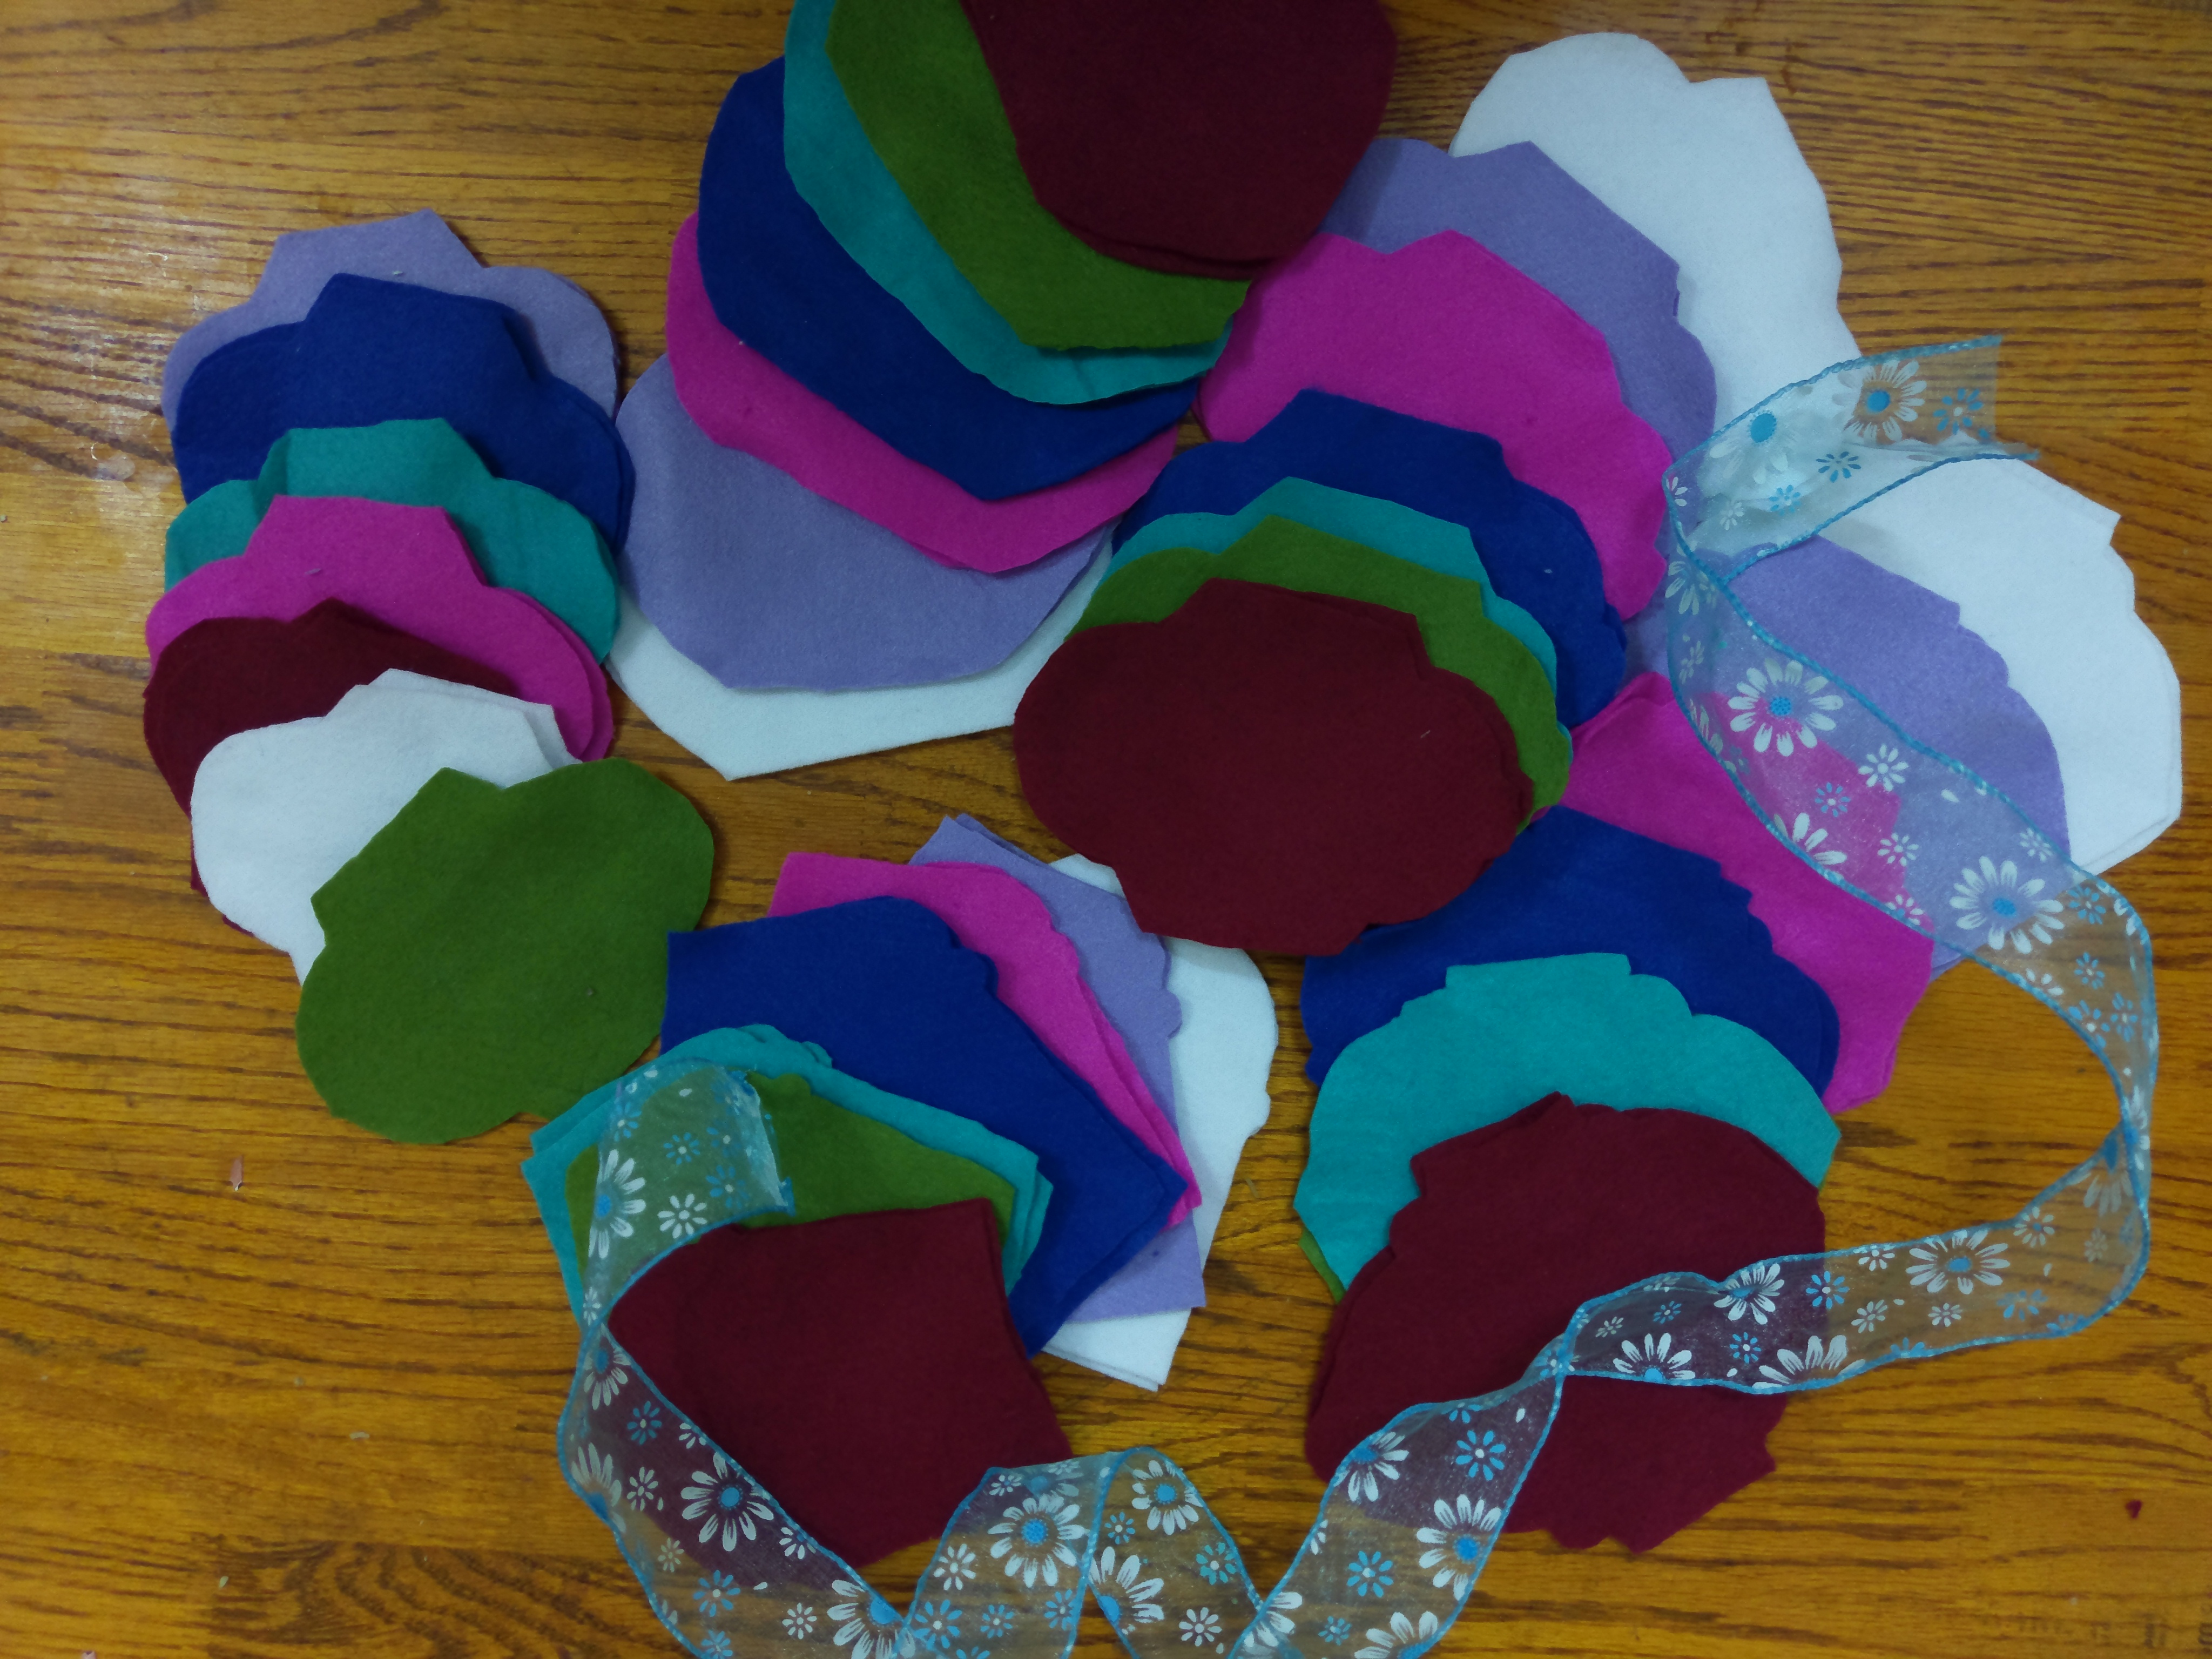
- These are the colors I decided to use. Six colors, five patterns, one of each for each day of the month. I was to choose only one of the greens, and just laid them together to see how the colors blend. I decided to go with the minty green and scrap the olive green.
- Trace the pattern on the respective sheets of paper or felt and cut them out. You could fold each in half and trace half the pattern, and cut them together to make sure they’re symmetrical.
- Cut out the voids or windows on them

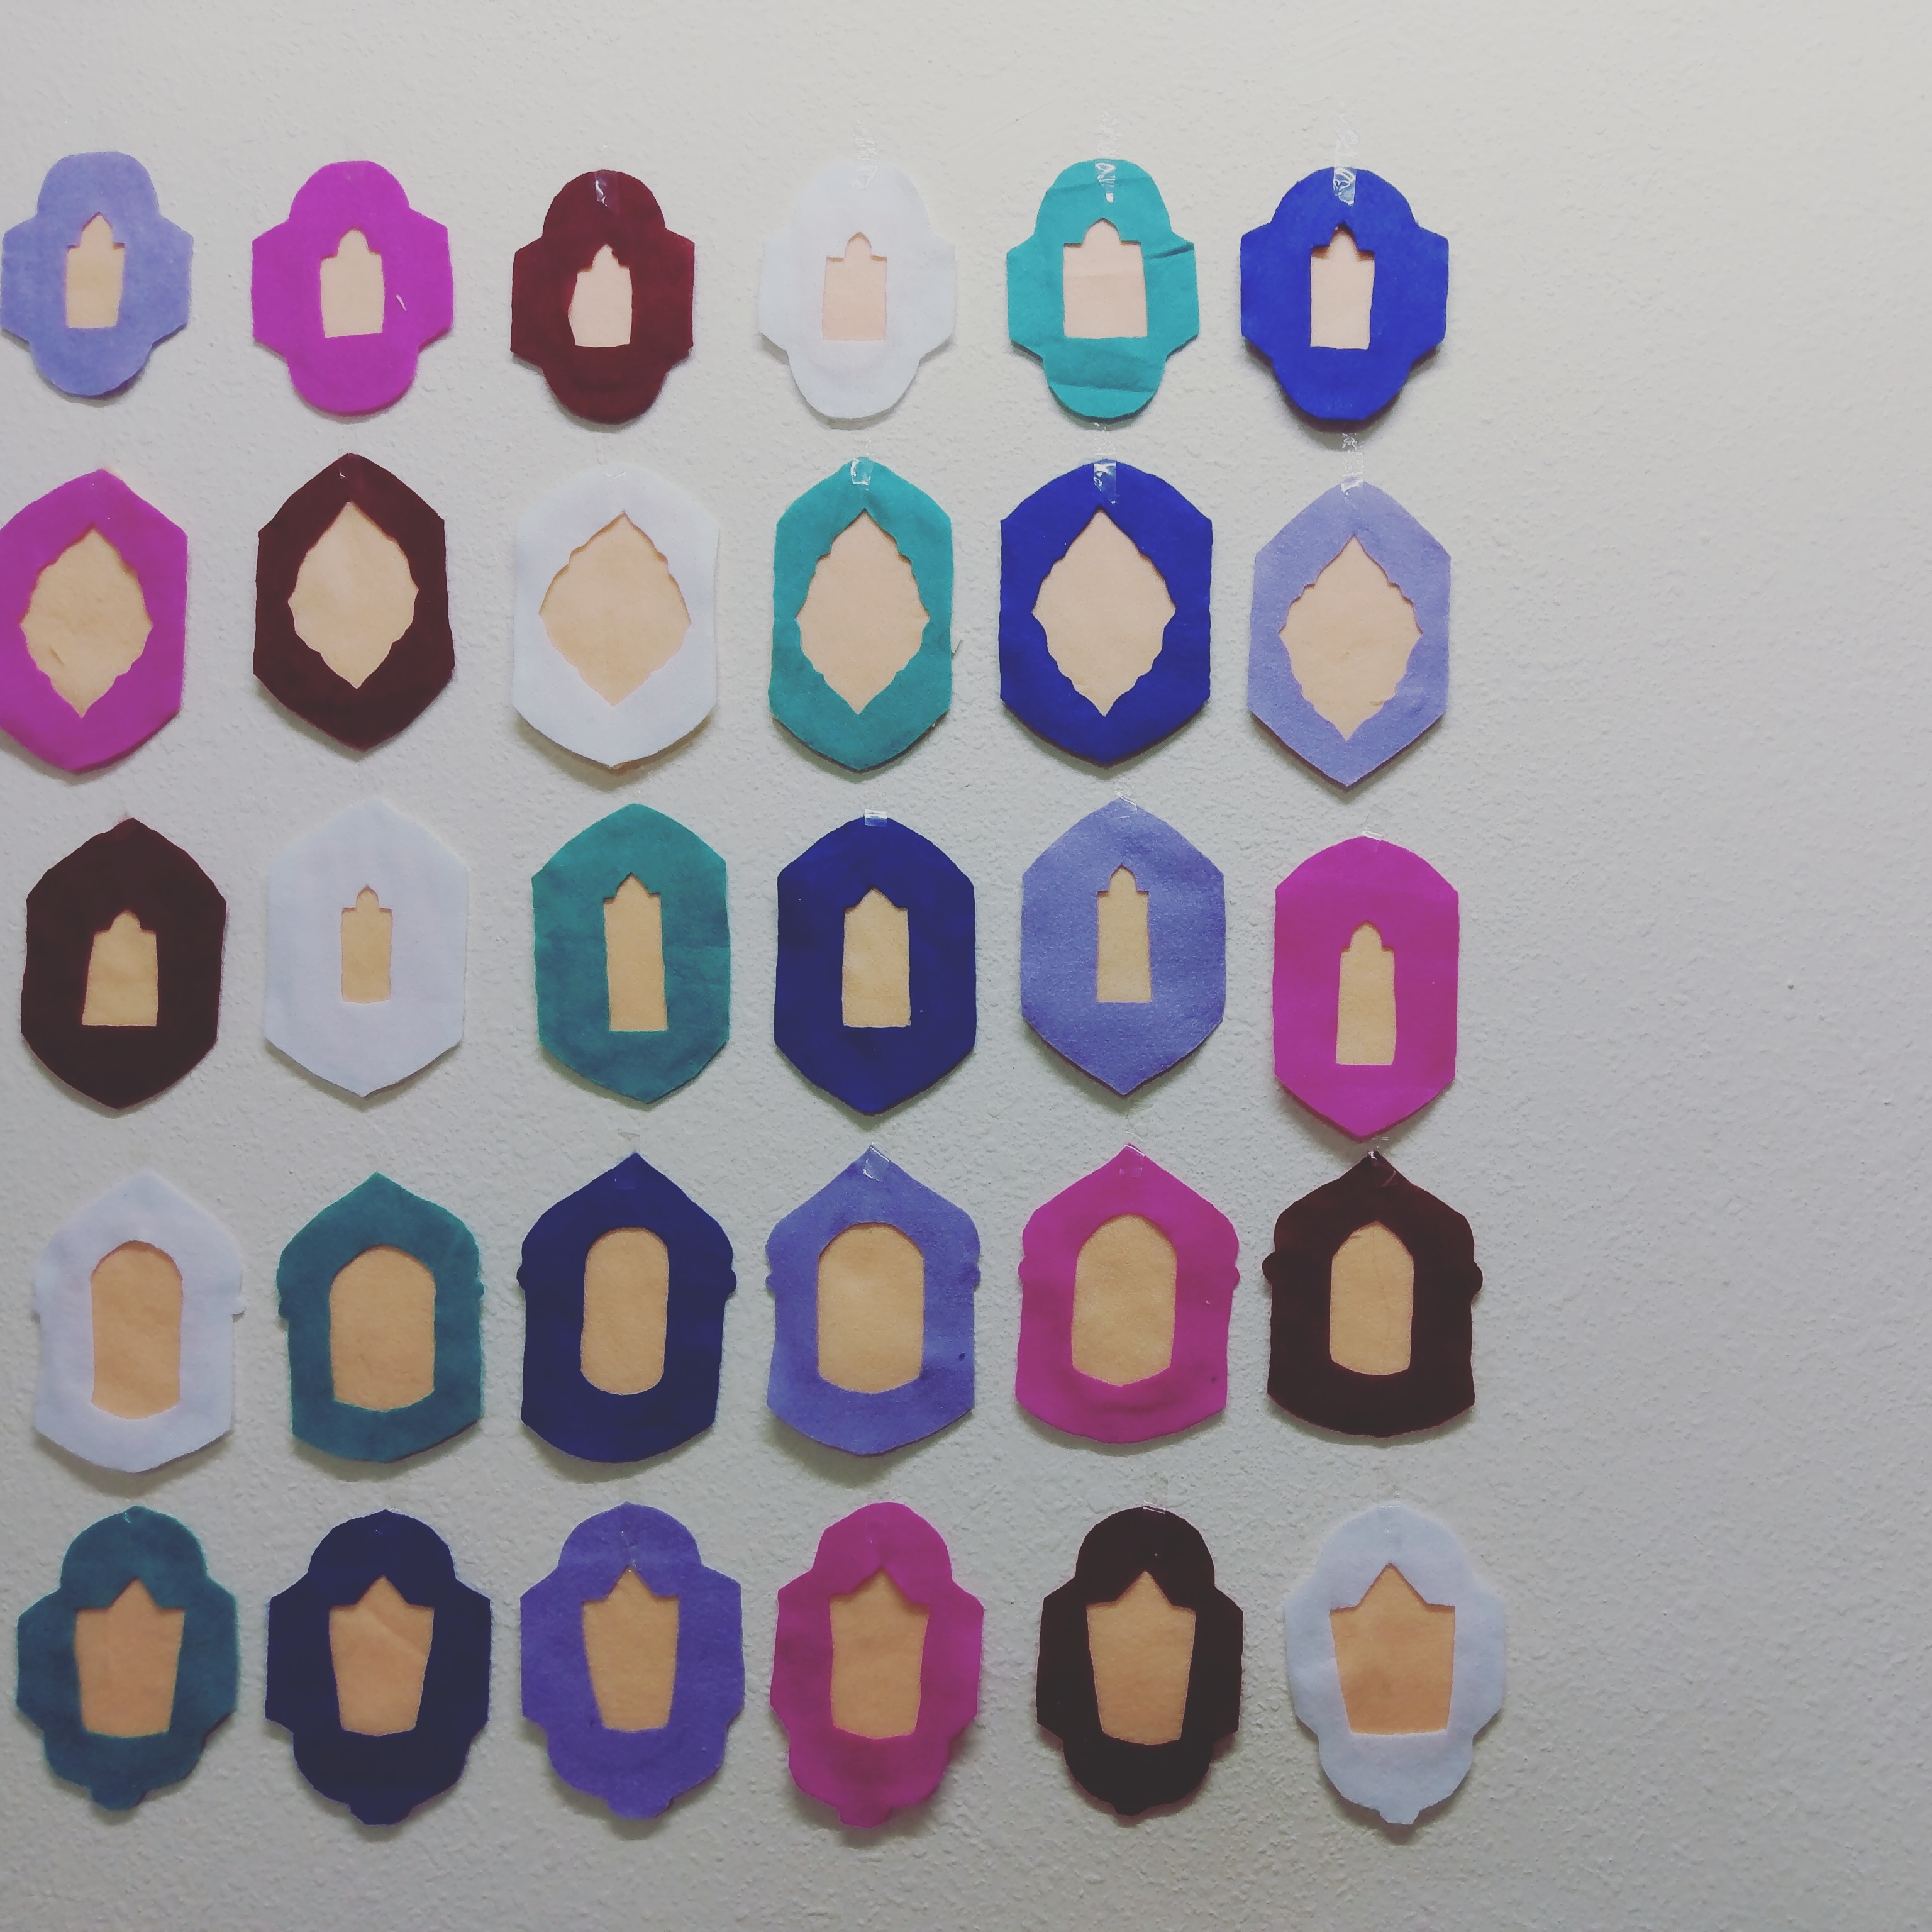
- Here’s how I taped them to the wall before mounting them to be sure of the arrangement of colors and patterns. I tried a flesh tint piece of felt behind the window but I didn’t like the look. I did love the overall arrangement though. Honestly, I didn’t want to take them off.
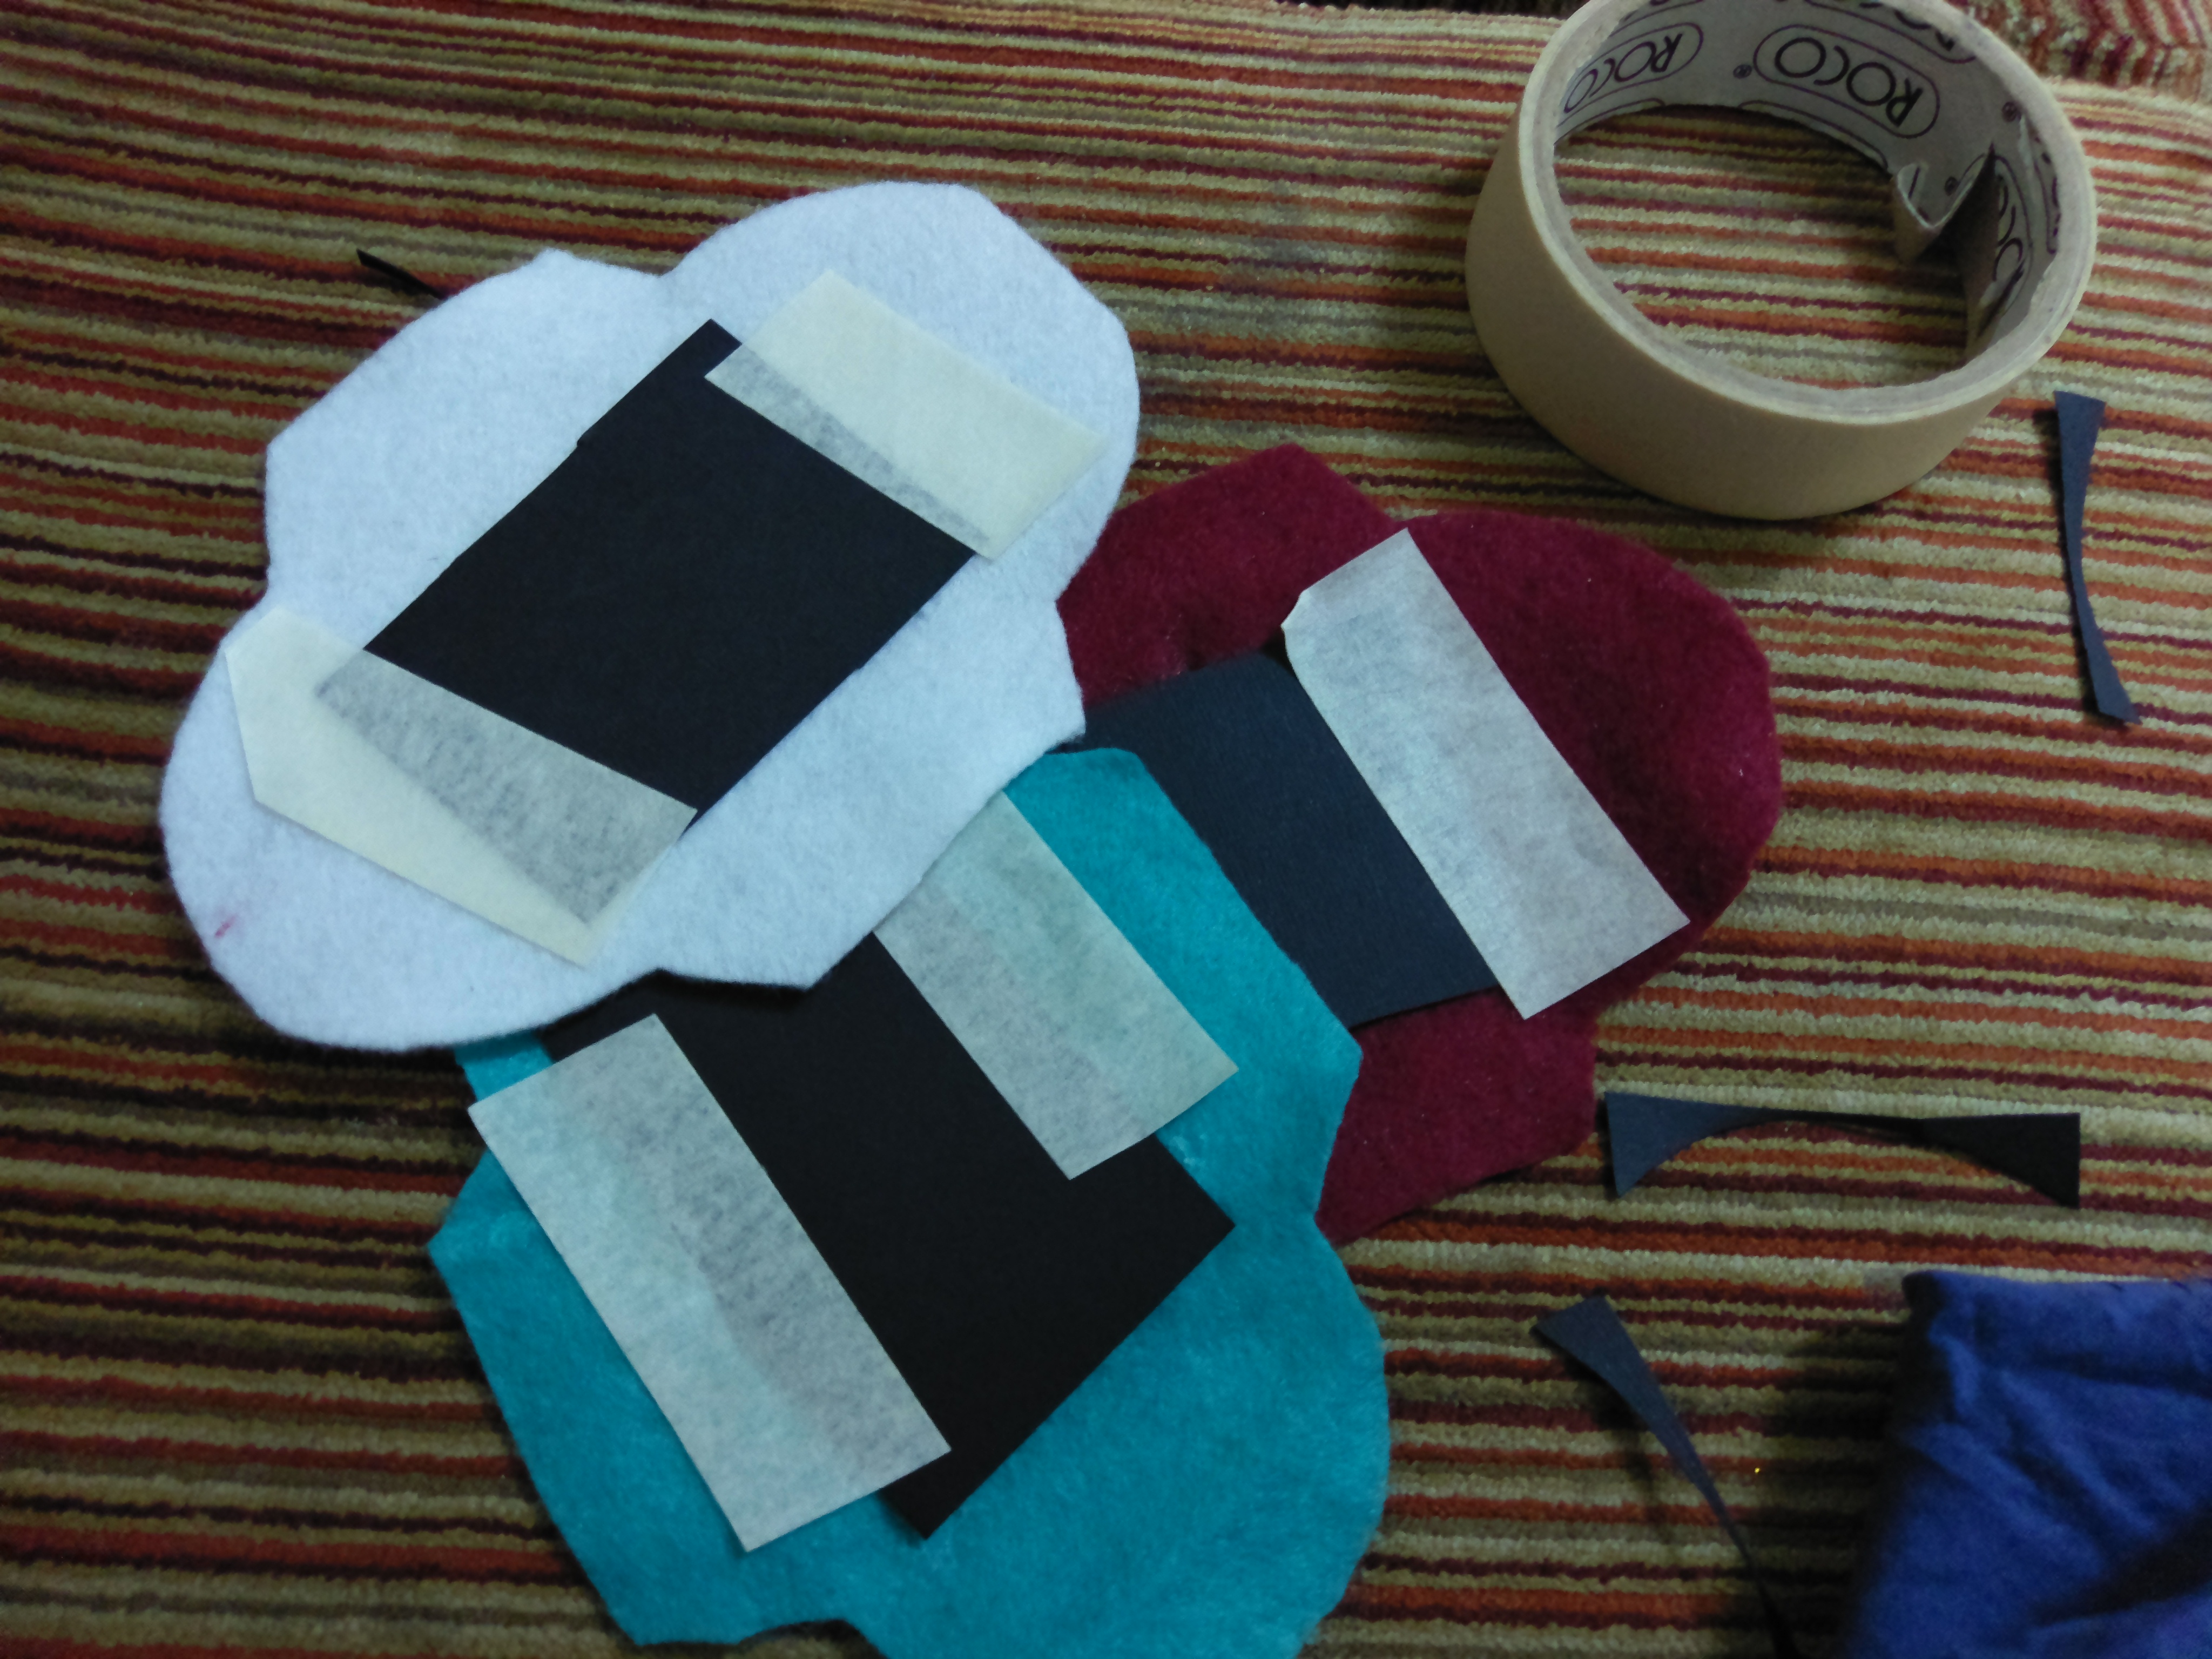
- On one side of each black rectangle, write a number to correspond to the Ramadan date. So that would be 30 black rectangles with a number written on it.

- Place the black papers on the back of the lanterns and simply stick them with some washi tape or masking tape. Don’t worry about it being messy. This part won’t be seen anyway.

We’re done with the lanterns, let’s get to the presentation.
- Cut out the yarn into five Strings each of 120 cm length.
- Take each lantern and clip it to the yarn in the right sequence equidistant from each other. Each string should have six lanterns.
Tape both ends of the yarn to the wall. Trim any excess off both the sidesif you wish. I left it hanging, in case I wish to make more space between each lantern. Besides, they’d be hidden behind the frame any way. When you are done with all of them, this is what it should look like:

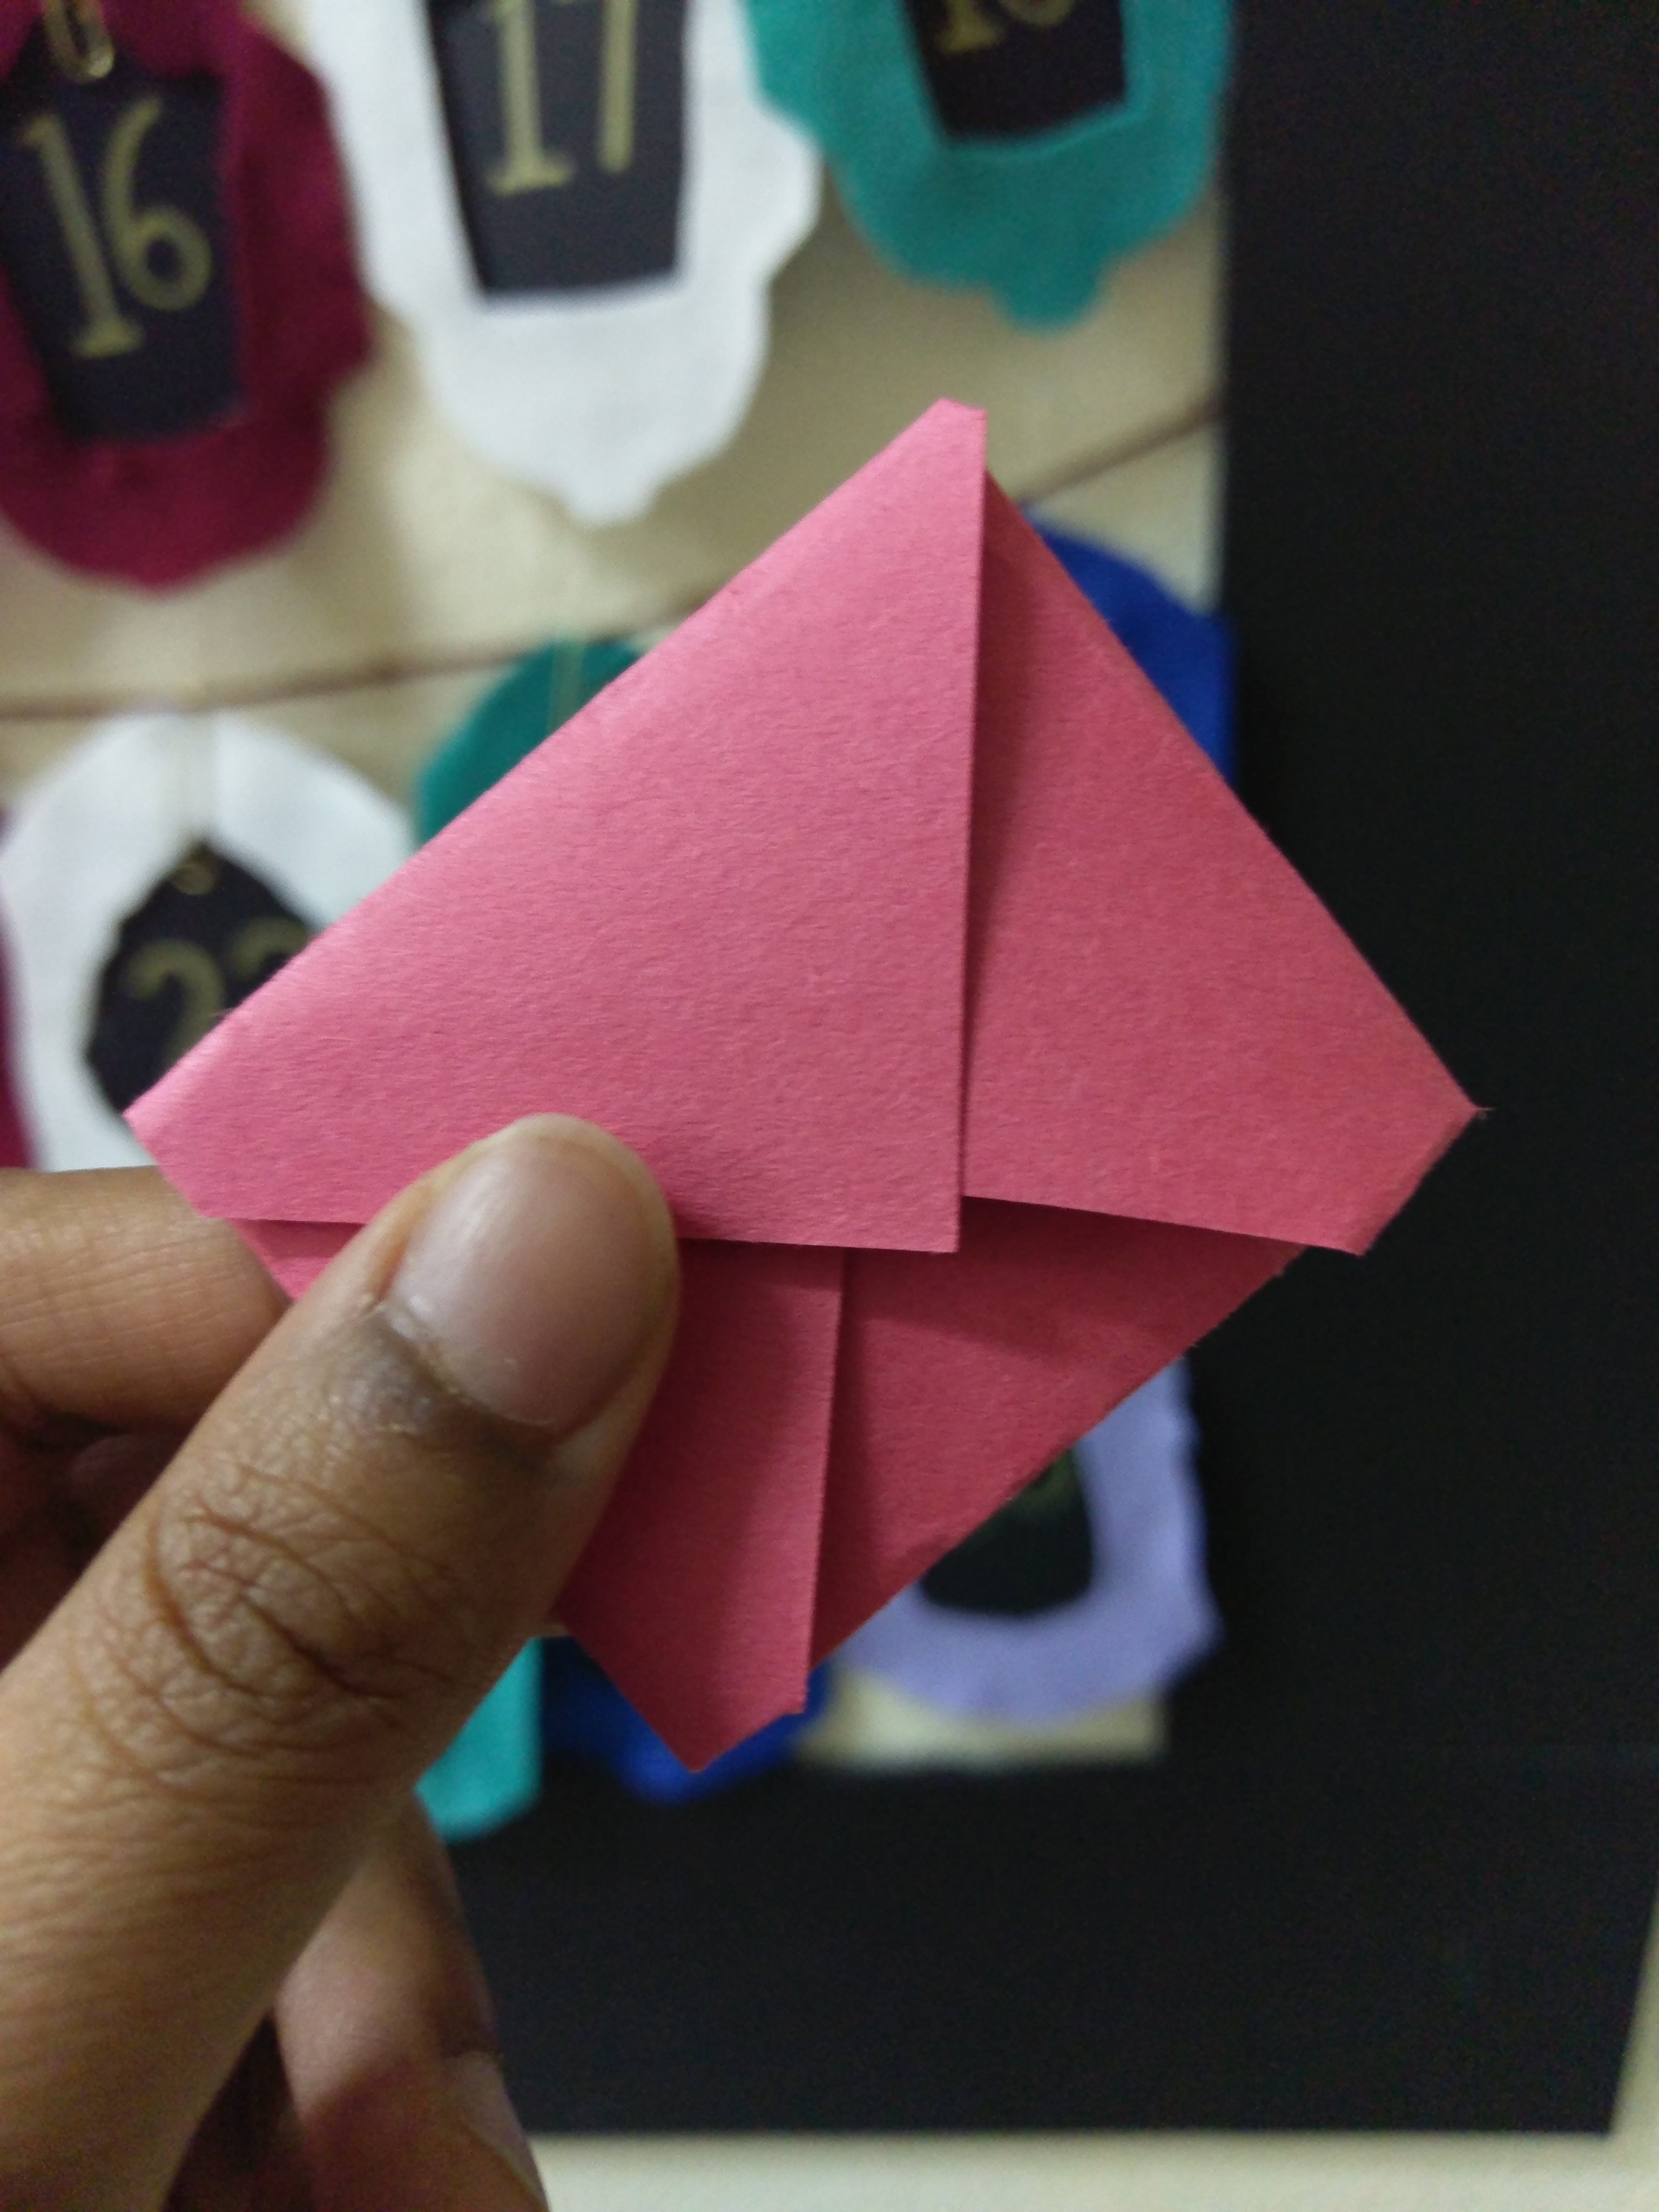
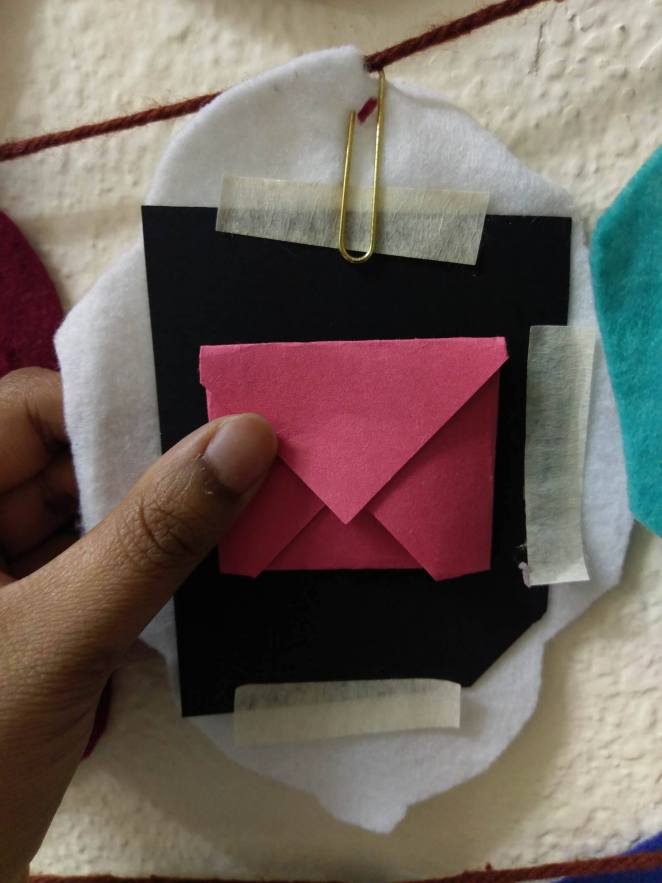
- Cut out 30 squares of 8 x 8 CM from the construction papers. Write out the messages on one side and do an envelope fold to create tiny envelopes. Stick double sided tape or roll out cello tape to stick these to the back of each lantern.

- To create the frame with a foam board, I cut a foamboard of A2 size into four equal strips along the length and arranged the pieces to form a frame. Place strips of mounting/ double sided tape on the back side of each strip of the board and stuck them on the wall individually. You may also use an existing frame you already own. If you have the source/ resource, a wood frame would look top notch!
Feel free to decorate the frame with sequins, mirrors, string lights, writing, pattern, doodles, etc. if you wish


- Now you shall do the honors of mounting it on the wall. You shall remove a surprise chit from the back of the lantern each day around iftar and reveal the surprise to your kids.
I hope this DIY is something you find interesting & enjoy doing. You can take these out every year and just replace the black paper to create gifts or surprises to suit the ages and interests of your children, in Shaa Allah. Let me know what you think!
Like us on facebook and follow us on instagram to see our works in progress and little sneak peaks of upcoming projects.

Thanks this is very cool art project for children to do
LikeLike
This is a fun family activity. Thank you for sharing.
LikeLike
So innovative and creative way of marking a theme for all days of Ramadan. I can imagine the excitment of opening each card everyday and seeing whats in store for us.
LikeLike
looks great masha’Allah! Fun for the kids to make too and will keep them busy
LikeLike
This is so well made!
LikeLike
These are so creative and fun. I might give it a go next year
LikeLike
I’m sure you must have had an amazing time assembling everything. It looks great, and sounds like a wonderful activity for kids. I can’t wait to do all this with my son. Insha Allah, next year!
LikeLike
This is such a cool project! I have been wanting to do an advent calendar this year but i think my son is a year too young for it Hopefully we will be able to try it next year inshAllah!
LikeLike
Looks lovely. Kids will have fun doing this!
LikeLike
I love DIYs, and this one looks like so much fun. The messages envelopes at the back are so clever.
LikeLike